Monday, May 30, 2011

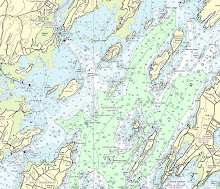
I bought this fun poster for my Captain.  It's a surprise!  Don't tell....  Isn't it great!?

Summer Has Begun....

Summer is officially here.  But it is a sad start for me.  Memorial Day weekend marks the beginning of summer here in New England and our Monday holiday felt the heat....we had 81 degrees on the thermometers and often it felt hotter than that.  But sadly,early this week my father, of only a mere 62 years young, died.  He enjoyed sailing his own boat and often came out with us for a sail each summer.  he was soo happy that I became and "adventure" type of girl and was comfortable with trying new things and especially at home on the water.

Here he is last summer, behind the helm of our boat Sea Mist.


I will miss him soo much.

Sunday, April 24, 2011

V-Berth Sheets

I realllly wanted custom v-berth sheets but after getting a price quote and it being higher than the cost of a expensive plane ticket to Florida, I decided that it may be something that I could do myself. 

Often when making up the v-berth I use 2 flat sheets.  They work great, but there is alot of extra sheet at the bottom, where the berth tapers into the bottom of a "V" and is a mere 15" wide.  Tucking in all that extra sheet leaves the foot area of the mattress bumpy.

First I took measurements, and thought that I could simply lay the sheet on the floor (in the house) and measure and cut.  But I wasn't that secure with my measurements and angles (not my strong point, but I'm great at other things!) so I abandoned that idea.


I simply brought the sheet into the boat, laid it out on the V-berth and simply cut with pinking shears the size I wanted.  Then I brought it in and sewed a simple hem all along the edges. 


This custom made flat sheet will serve as our bottom sheet and wrap around the mattress.  I will secure the sheets underneath with sheet "suspenders".  I did the same for the top sheet, so we don't have as much bunched up around our feet.  Perfect!

Away She Goes...

The hauler came on Monday the 18th of April.  The earliest in our boating history.   Here are some shots from the process.

The truck, backing in. I personally think we have the easiest driveway to do this type of job.  Short, flat and clear of trees.  Easy-peasy!


Backing under the boat...


Backing up more and more...there!  Perfect.


Up go the hydraulic boat pads to support the boat.


And she's off.  This whole process took only about 15-20 mins.  The hauling company was prepared to haul 5 boats on this day and we were the first.  They arrived at 7:00 AM and were gone by 7:30.  Sea Mist was delivered to the boat yard and immediately put on the travel lift at the marina and put in the water.  The mast and rigging was put up immediately as well.  Pictures to come!

Sunday, April 17, 2011

New Lettering


Up next, new lettering.  Captain is measuring for some spiffy new letters.   The boat went the whole season last year with "Kittery Point" on the stern. We don't live in Kittery Point!  The boat will go in the water tomorrow but Captain will still be able to apply the lettering while at the dock.  We really have no choice as our lettering "guy" is out of town this week and the boat has to go in when the boat hauler says so.  To be continued....

Lattitudes & Attitudes

Those of you that read my soap blog know that I also like to cook. And bake. I combined the sailing and the cooking interests and submitted some recipes to my favorite Sailing Magazine, Latitudes & Attitudes. The magazine chose me as one of their feature cook in their "Galley Gourmet"! Here is a shot from the magazine:

I will post the recipes too. I think you'll enjoy them. Super Easy Beer Bread, Chocolate Pudding Cake and a Cheesy Rice & Bean Bake. I was sure to make them all in my little on-board oven in my tiny galley on the sailboat. I wanted to be sure that these could indeed be made on a boat successfully. I listed some shortcuts for easy cleanup and multiple ingredients (with limited space on board, these tips were helpful). It was fun! I am working on more recipes to submit to the magazine again.

Saturday, April 16, 2011

12 Volt Power Port

Captain also installed a 12 Volt Power Port outside in the cockpit near our stereo speaker and helm.  The idea here was that we can now plug in and charge cell phones, VHF radio, emergency GPS etc.  Running wires from the Busbar (is electrical power distribution ) in the Starboard locker to the helm was not to difficult, and took him only about a 1/2 hour.

Very few supplies needed for this project:


He placed it under the Auto pilot, seen here, which is very close to the helm.

800 Watt Power Invertor

Another added luxury we have on board is a flat screen TV.  Yes, I know, a TV, on a boat.  But we enjoy our chilly nights inside the cabin watching a movie or Saturday Night Live while enjoying cocktails and playing scrabble.  We often had trouble with the current inverter just not being powerful enough to run the TV for more than 30 minutes or so.

See, it's just a small TV.

So, Captain installed a more powerful one.   This project took a couple of hours as he ran wires from the v-berth closet (TV wires) to the battery area (in the Galley).   I will surely enjoy this extended TV/Movie time with my Captain!

Let The Music Play!

Captain picks up all sorts of great deals on stuff that we will someday use.  And this was one of his finds.  He installed a exterior, weatherproof, West Marine speaker.  This way we can now listen to music from our Radio/CD player while outside in the cockpit without having to crank it up very loud at the system down below.

Not only that, but he installed a special switch that allows us to turn the outside speaker on or off!  This way, if we are not outside but listening to music inside, the whole mooring field/boat yard/dock doesn't have to listen to The Dave Matthew's Band or Jimmy Buffet every time we do.  He's soo clever to add those special touches!

New Battery Charger

Captain installed new battery charging system.  The boat didnt' have a charging system the batteries only charged off the alternator. Now when we are at dock we can charge the batteries using shore power.  It is a brand new unit given to us by our friend and Marine Surveyor, Mark Corke of On Board With Mark Corke fame.   It is specially made for Marine Batteries and "normal" chargers will not charge the batteries well enough.

Captain installed the system in just about a couple of hours.  Installing it easily inside the batty compartment under the sink.  Captain simply installed it and wired it up, that's it!


Stern Rail Seats

Captain really wanted a boat with Stern Rail seats. We had a 1994 Hunter 26 with Stern Rail Seats back in 1998 or so and they were great.  We loved sitting up there with a drink in our hand slightly hanging out over the water.  Or, I would sit in the seats when the boat was speeding along.   We really enjoyed them.

Installing our own Stern Rail seats could go a few ways. We could order some pre-made for our boat specifications and install them.  We tried that.  Unfortunately, they didn't have a pattern for our boat. We would have to measure and that would leave lots of room for error.  Neither of us were comfortable with the cost of this possible mistake.  Next up, Captain could make his own and cut the Stern Pulpit and fit the seats in.  I wasn't sure about this.  Any cutting on boats can be scary and expensive.   The last option was creating seats but not extending them over the water and not cutting anything.  That was what we chose.

Captain simply created some seats out of Star Board.  Purchased at Hamilton Marine for about $30.00 for a 2'x4' size sheet.   He added in some hardware, stanchion bases, aluminum 7/8" tubing and rubber feet.    He measured our backsides to make sure that we would be comfortable, cut and attached the hardware all in just a couple of hours.  Simply clamp it on to the Stern Pulpit and wa-la!  We have stern rail seats. They even fold up if we want them out of the way.  We are very much looking forward to sitting in these new seats!

Here is the seat all cut out.


Adding the hardware and attaching it to the rail.


See? It folds up!!  And notice that this is all being done while the shrink wrap is still on the boat?  It was chilly out there and at the very least, this kept Captain out of the wind.


Here is the finished seat.  It's pretty basic, but it awesome!  We can sit in it and comfortably rest our feet on the seat below.  Bring on summer!


Sewing Lesson

We had a few un-raveling seams in the main sail cover that got really bad at the end of the season. We knew that we would have to fix it before the start of the 2011 season, but do we pay to have someone fix it, or do we try to do it ourselves.

It would require a lot of sewing.  Several feet had come un-sewn in several spots.  Not only that, but there were many sets of double stitches.  But it seemed silly to pay someone for something that I could do.  I could try, right?  What would that hurt?

Captain bought me a new sewing machine about 8 years ago, and I can sew, but just the basics. Forward, straight stitches.  And on cotton.  This was different, this is heavy textured canvas and serious stuff!  Not just a basic curtain for the living room.  I was a bit nervous.  But, together we went to Joann's and got a heavy duty needle and thick thread and Captain said I could do it. 

A little surprise for me was that Captain also wanted to learn how to use the sewing machine.  So, I taught him how to thread the machine and make a bobbin.  I showed him how to sew forwards and to sew backwards to lock the stitches in place.  And together, we did it!  We sewed the main sail cover.

Here are the tears.  Well, not really tears, but stitches that came undone.  Serious winds just ripped those stitches out.


Here is our "helper", N.C. (New Cat).  Why is it the moment you put something on the floor/sofa/bed and are working/reading/folding it the cats want to lay on it? 


Here you will see that Captain is holding the pieces together, and we attempted to pin it, but it shifted too much as the canvas was very thick for the pins.  It wasn't working.  We ended up using double stick tape to hold the seam together and then sewed it on the machine.  Only problem was the tape was sticking to the machine and the table, the needle got sticky too.  So the next time we sewed we simply made sure that the tape was folded over and any extra tape was not exposed at all.  It worked great!


Here I am sewing away.  Showing Captain how it's done. 


And here is Captain, taking his turn at the machine!


We did it!  It all came out great and the next night Captain was at the machine again, reinforcing some of the weaker seams of other canvas parts.  Up next, he ordered some clear plastic and we plan to put a window/skylight in the Binmin Top as he can not see the wind indicator when standing at the helm and the Bimini is up.  Soon we will blog on that project.

Replacing Rotted Flooring

When we bought the boat, we noticed and pointed out to the seller that the floor in the aft cabin was rotten, soft, baaaad.  Captain discovered a leak (before we bought it and we had the owner fix the problem) and chalked it up as another project for later on.

You can see below the water damage.


So Captain pulled up the floor late this winter.  Or really, just picked up hand fulls of wood fibers.  It was that soft.  He pulled it all out and cleaned up the area. 


Captain checked in with ourlocal boat yard (Royal River Boatyard) if maybe they had some scraps of  Teak & Holly flooring. And lucky us, they did!  This saved us from buying a full size 4'x8' piece of flooring at around $200.00.  They cut him a great deal on some odd shaped scrap. 


Captain worked about a day measuring and laboring on the floor.  First he traced the space using a piece of tar paper, since we didn't have the old piece of wood to use as a pattern (remember, it was rotten).  Cutting, sanding and fitting it in wasn't a problem.  More time was spent on varnishing, sanding, varnishing, more sanding, varnishing and sanding again. A final coat of varnish made for a super shiny floor!  Fitting it into place was a dream and securing it with screws and wood plugs wasn't too bad either. 


It is gorgeous!

We're Baaaaaaccckkkk!

Here we come summer, here we come!  Clap clap clap.

The boat is going in the water on April 18th!! The earliest every we have ever put the boat in the water.   We are using a hauling service from several towns away and they arranged for all the Freeport boats to be hauled in the same day.  We save money in charges for gas and transportation as we will now share that expense with the other Freeport boats. BUT we were not expecting this.  Captain has been working very very hard every night after work and every spare moment on the weekends to get the boat ready for the transport.  

Several projects have been crossed of the list. First up:

Sanding and painting the bottom.


 Yeah.  We still have snow on the ground.  But it was a beautiful night.

New Holding Tank

One of the other projects on Captains list this winter was to replace the 8 gallon holding tank with a 25 gallon tank.  The project lasted only 1 weekend, really most of the day Saturday and only a couple extra hours on a Sunday.

He ordered the new tank from Hamilton Marine in Portland and it took about 2 days to come in.  Once he had it in his possession he had to get to work on it right away.  But first, take out the old tank.   It want' that bad, he checked all the hose clamps, to be certain the clamps were tight (he didn't want to spill any of that antifreeze and lets-not-think-about-it stuff on the very bottom of the tank).  Removing the old tank would have been easy, but one of the hose clamps was indeed tight, but not tight around the actual hose!  Captain started moving the tank just to take a peek at what he was dealing with and of course, that one clamp/hose combo. started leaking. GROSS!  Captain doesn't mind getting dirty, but this was not what he was okay with. After putting things back in place, re-attaching the hose and tightening the clamp, putting a large size garbage bag over the tank,  he removed the tanks and thoroughly scrubbed himself and everything around it.

This is the old tank.

This is the space fore the holding tank.  This is in the locker under the cockpit.  Captain is 6'4" tall and he really squeeze in this space.  But he did it!


He built a level platform for the tank to sit on.  Scrap plywood and attaching a larger platform over the existing one.  Perfect!


He put the new tank in place, easy-peasy.  Connected the hoses and tried it out.  Okay, not really.  He ran some water and more antifreeze through it.  I am writing this on April 15 and it was 42 at the highest temperature today.  Anti-freeze is a necessity even at this time of year.


We are all set for long weekends now!

Wednesday, February 16, 2011

Summer Fun Is Over, Here Comes Winter

. The summer came to an end and I didn't want to admit it....but here she is, Sea Mist coming home. She is being backed into her winter spot next to our garage.


Here is Captain shrink wrapping the boat. He will put a small zippered doorway in the shrink wrap for easy access for some small inside projects he can work on in the Fall and the Spring. See the flame near his head? He is using a propane torch to shrink the shrink wrap.


Winter is too cold, so we will have about 4 months of nothing but time...

Here is Sea Mist now....(well, last week during a snow storm) You can see her all bundled up against the cold, snow and wind beyond our plow Jeep. Soon, Sea Mist! Soon.

Fall In New England

Fall is here.  Our long weekend sailing adventures have come to an end.  We are bummed out about it but we know that we had an incredible summer.  We had soo much fun on our new boat and had some great adventures.   We played all summer long!  But the colder weather and choppy seas are only allowing for day sails now and soon, the boat will have to be hauled out of the water.

Here are a few pictures from our sail this past Sunday.   We took a nice cruise around the harbor and out past Pound Of Tea Island and over to Bustins Island. 


You can see that the leaves are staring to turn. 


This kayaker stopped and asked us for directions!  Wonder where he was from?  He must have been cold.  I was a bit chilly and I was wearing jeans and a sweatshirt AND tucked well under the dodger and out of the wind.


Did I ever tell you that Freeport has a Castle?  See it in the tree line there.  I will blog about that next.


We had a nice sail, but we didn't stay overnight.   The night temperatures are dipping down and mornings can be very chilly.  Maybe next weekend, will see. 

Captain is thinking of hauling the boat out a bit earlier than he usually does.  Sometimes he pushes it into November.  But he was thinking of all the "stuff' he wanted to do to the boat before he shrink wraps it for the winter and getting it home while it was still a wee bit warm would be helpful.   

We haul our boat to our house, only about 5 miles away, and it sits in the yard all winter.  Captain shrink wraps it with a little door so that he can get in and out during the winter months to work on a small project or two.  He made his list of things to do and it's more than just one or two this year.  He is hoping to get some things done before even shrink wrapping.  The regular chores include winterizing the engine, the hot water heater and the toilet etc.